Monday, December 28, 2009

Painted Leaves on Canvas


I’m very fond of (Read: OBSESSED with) leaves and try to use them on many of my projects. On a trip to our back-garden, I found these lovely leaves (name unknown, sorry!!) which were shaped like trees themselves.


I thought they would look beautiful on a canvas, and set on to press them. You can use any leaves which are beautifully shaped. For pressed leaves, I simply put in the leaves which I like in between newspaper folds and placing a small pile of newspapers above. If you want, you can press them under heavy weights like books, but I rather the newspaper methods as it preserves some of their textures, instead of flattening them totally.

Singed Fabric Flowers – Love ‘em!!

I came across instructions for a good technique for making oh-so-pretty fabric flowers. Unfortunately, I forgot the site’s name, but on the brighter side, I do remember the how-to! Lucky me, for you can see how well they turned up!


These are dead easy to make, yet quite deadly if you get careless in the process. Not a child’s project certainly…though a child’s play for grown ups. You will need:

Saturday, December 19, 2009

Pebbles Vase

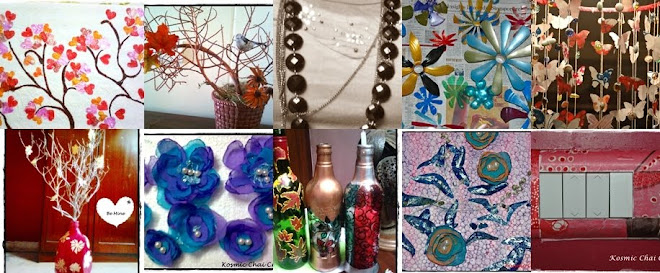
I always saw these glass pebbles sold on the beach, and loved them..but had no ideas regarding their use..


…until I found an empty whisky bottle!! I know some of you will say: “a bottle, again?..sigh!! But I love to decorate these bottles, somehow can’t keep my hands off them. So here I was, facing my pebbles, and an empty whisky bottle (you can use any other round or flat glass surface, really). 


So here is what I made...

My, isn’t that classy?
This particular project is more about imagination really, than a particular set of steps to be followed, but I’ll narrate my story anyway.You will need:

Sea pebbles (lots n lots) in your choice of colors and shapes
Glass bottle or any surface you want to decorate, really
Acrylic paints , black glass liner for stems
Paint brush
Hot glue gun, or any tough glue


You are ready now. Clean the surfaces of the bottle, wipe it dry. I painted the bottle with thick layers of olive green and sea blue, to remind me of sea and sands…I then let it dry as the coats were too thick.


After it had all dried, I proceeded to stick the pebbles with glue on to the bottle in decorative shapes. I did it in flower shapes..you can do it in the form of any shape you fancy. However, be careful not to overdo to make everything messy. Learnt that the harder way J

Here it is up close..


I tied a golden ribbon on to the neck of the bottle, coz it had gotten little messy there, so I had to cover it up that way! It does not look bad though.


There it is – I put in a twig and added a fabric flower I made with a white cloth. Doesn’t it look all dressed up and vintage!!
I hart my pebbles vase!!
I linked this beauty to a fun blog party

Tuesday, December 15, 2009

Fall inspired candle holder

Hmm..you’ll be thinking, more candle holders?? Well, I love them so much that I cant seem to keep my hands off making them. So here goes another. I found a lovely green colored empty wine bottle at my cousin’s place. She was too generous to give it to me and my mind started racing as to what should be done to make it a fabulous candle holder. Here is what I did to a plain green bottle:

I was always in love with how beautiful and magnificent the maple and oak leaves look in the fall season. In India however, we do not have maple trees. I really missed the magic of red, orange and gold leaves. All those who live in the countries abroad must be having such fun with these fall leaves. Now, I wasn’t the one to just imagine; I had to make a fall inspired candle holder somehow.
So I set to cut out paper maple, oak and other fall leaves to make my own fall collection, even if out of paper, lol! Find out how:


I cut them up, then painted them (or tried to!!) paint them in the colors of fall: tan, red, burgundy, orange.


Okay, you may find these funny as fall leaves, but they are MY fall leaves all rite!
I went ahead and stuck them in a random fashion onto my glass bottle with some fast glue. Remember that there is no specific pattern to be followed here, its all random.
After it was all dry, I outlined each leaf with the help of a gold glass liner and let it dry for another 2 hours. I know you must be thinking, drying? Again? Lol!


Tada! I captured the fall season alrite, and the memory will glow proudly as I light the candle up….
Here are all three of my glass candle holders together…oh my, they are pretty!!
I've linked these beauties to:

giveaways


and at
Funky Junk's Saturday Nite Special

Monday, December 14, 2009

Birds-on-Branches Mobile

I was kinda bored with only glass bottles as my crafting instruments, and came across this beautiful bird mobile (http://www.rufflesandstuff.com/2009/09/bird-mobile.html) by Disney at ‘Ruffles and Stuff’. Check out her blog (www.rufflesandstuff.blogspot.com), it is full of lovelies. I just love her way of ruffling things up in a classy sort of way!

Well, like millions of others who have already made this mobile, I stepped in too! The top corner of one of the walls in our bedroom was little too bare, and I set out to hang a pretty bird mobile there. Like Disney said, it was the easiest project alrite, except that the positioning of the branches is the most crucial aspect of it all. 


This is how I made this:


Amazing candle stand bottles


Once again I have been off for long, but most of the blame goes to the MBA classes which I’ve been having from 9am to 7pm even on Sundays, and its getting tiresome…phew! I haven’t been idle though, as you will see, coz I have made these ravishing beauties…


I had one or two empty wine bottles at home…u know how we keep stacking them on and on thinking they will be useful some day…anyways, I thought of making something useful with them, and came up with the idea of candle holders or stands…aren’t they too cute? And so very functional! It can two-time as a classy décor item as well as a candle holder. Read on to know how I did it!

You will need: