Phew, I’m here nearly after ages! Though I was down with a bout of sickness, I’m back for good…I know I’ve been away for a long, long while, but to compensate with this absence, I’m here with these cutie toys…check ‘em out, they r cool!!


Okie, here’s the deal…I know the pics quality is li’l disturbing, as my camera has been sick too and has gone for repair…I had to suffice with the one in cellphone only, and it wasn’t as great. Sigh!
However, the crafty genius in you will know that these cutie toys are very easy and simply fun to make. I wanted to make some cute n easy to make toys for my niece; and was surfing through craft sites when I saw some ‘plushies’ which looked just too great. Here is the site:www.chezbeeperbebe.blogspot.com. Check out plushies and other crafts made by Holly, they are amazing! I was mightily inspired, and decided to do something similar, but let me admit that I’m nowhere as skilled at it as her!
And there were some ‘big’ problems…I had no felt lying around, and I haven’t ever tried making stuffed toys. However, I had loads and loads of old t-shirts lying around. That and the desire to gift my darling niece with these cutie toys made me go on with it, just the same. The t-shirt fabric makes the toys so very soft, and the finished toys look so very cute!! So here goes the tutorial:
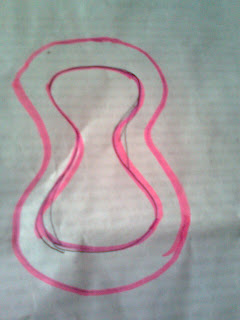
- Take a scrapbook paper and draw this shape on it. Leave some allowance (around 1cm) for sewing.

- Cut the shape with the help of scissors and with a water soluble marker pen; trace it along on the fabric of the t-shirt being used by you. Fold the fabric in double first.

3. You will have two pieces looking like this.

- Place these two pieces one over the other with the right sides facing each other, as shown in the picture below.

- Now sew along the edges, leaving some allowance. I used basting stitch with hand; it was so easy! Take care that you leave some gap so as to reverse the fabric so that the right side shows outside now, and also for inserting the stuffing. Use your index finger or a knitting needle to reverse the stitched fabric inside out.
- I know, you must be thinking that it looks very puny. Not to worry, as it will fill out as you stuff it later. Do not worry if the edges look little rough and unsymmetrical, it can be corrected and smoothened once we have stuffed the toy. Now stuff the toy with cotton or with remaining t-shirt scraps. I used t-shirt scraps as I wanted to save cotton for another project and there was a lot of fabric scrap remaining, which I decide to use up wisely, lol! Now stitch the gap completely.
The stuffed toy will look like in the pic here

It is really up to you as to how much you stuff in. I wanted only a fluffy look rather than a real stuffed toy. So I left some space inside the toy, which made it very fluffy.
7. Now for the face of the toy. You need to cut another small piece of t-shirt (preferably white) in oval or heart shape for the face, like this

I apologize for the poor quality of the image, once again. But I hope you will get it J
8. Place this fabric piece on top of the toy where its face should be and stitch along the edges once again (you can hot glue it, too!)

9. Draw cute and pretty eyes and nose with a permanent marker. You can also use the eyes that are used for soft toys. I did not have them handy, hence marker came to my rescue, lol!
10. If you want to attach ears and nose and hair, tats easy too! Take a piece of a contrast colored fabric, and draw two semicircles for ears and a circle for nose, like in the image:

11. Cut these shapes and stitch as ears and nose. Use your marker pen with renewed creativity…and you are done!! Look how pretty and cute these cutie toys look!! My niece will sure love them!


I love them all, but this one is my favorite…


Aren’t they so very cool and fun to make? Make your own cutie toys now!
Linked to
Categorically Crafting @Someday Crafts
Linked to
Categorically Crafting @Someday Crafts


1 comments:
I love your versions of my Beddy Bye Beasts. And genius move to use t-shirts! I hope you will consider submitting photos to my Flickr pool of Beeper Bebe projects made by my readers--you can find the link on my sidebar at my blog--it is one of the red and white labels down the side.
Post a Comment
Make my day..post a comment for whatever you read, it will really be appreciated. Thanks for sparing some of your valuable time and stopping by!!