Tuesday, February 23, 2010

Glass Gems Earrings- Modpodge Does it Again!


Here's my second attempt at jewelery making, since they said the first wasn't bad at all..Some dear blogger friends liked my crystal chain necklace enough to feature it. Thank you so much dear readers for the encouragement! That got me started on another jewelery venture..Glass Gem Earrings!

The simple yet elegant beauty of glass gems is felt by all. I had seen several projects with glass gems and they all rocked. I've used these glass gems in some projects myself, so I thought, why not make jewellery with it, too? So I made up these pretty earrings! Won't they just jazz up a simple skirt or a plain dress?

These are quite easy to make, and if you make jewelery regularly, almost cakewalk. Here is what you will need to make them

Now get started. Take a piece of fabric of your choice with a design that you would like to show in the glass gem. I chose a dark blue cloth with golden swirly designs (I love them swirls!). Now take two glass gems of roughly equal size and cover the flat area with some generous dose of Mod Podge. Now place these Modpodged glass gems on the fabric pattern that you want to show on your earrings, like this:

Remember to protect your carpet by covering it with newspapers first. Do not worry about the initial opaque appearance of the ModPodged glass gems as they will return to their transparent self once the ModPodge is dry. Here's what they look like, once dry:

One dry, cut the fabric to free the new 'patterned' glass gems, which will look like this:

Pretty already! Now for the little more trying part: the earrings! Okay, jewelery experts, do not cringe at my method of making them, as I hardly know or follow any hardbound rules! You need two small chains with small loops for this part. If you don't have one, join a few jumprings together. Now assemble some oval beads of your choice (mine were again transparent), and insert eyepins through them. Twist the free end with a jewelery plier and lock. Snip the additional part. The beads I bought already came with eyepin hoops and saved me a lot of effort. 

Insert the free end of the hooped oval beads into the rings of the chains (Have I lost you completely??), and twist. It is actually very easy to make, just follow the design you want to make. Link the beaded chain into the earring hooks. They will look like this, at this stage:

Now lay the glass gems flat side up. Snip two equal pieces of the metal wire (around 2 inch long each). Insert one end into the last ring of the chain to form a small loop and twist. Apply some tacky glue onto the back of the glass gems and place the twisted loop onto them. Cut two small round pieces of fabric to cover the loop. Place onto the back of glass gems, and press firmly. Now apply a thin coat of ModPodge for good appearance.

Let it dry amply, and wear these glitzy beauties proudly! Here they are:

Aren't these pretty? You can also opt the easier way out by wearing them simply as pendants in a chain. Apt for glam-ing up another plain look!
I'm going to make several more projects with these wonderful glass gems- be back soon!
I'm linking this to these fun parties..be sure to join me there:
Market Yourself Monday on Sumo's Sweet Stuff
Show and Tell on Blue Cricket Design


DIY Day @ ASPTL


Photobucket


Make it Yours @ My Backyard Eden
Get your craft on Thurs.

YOU'RE Into It! Linky Party! @ Hope Studiosgiveaways


make it wear it

Tuesday, February 16, 2010

Crystal Chain Necklace

I have a habit of venturing into things unknown and I constantly have newer whims..this time it was hand-made jewelery! I had never tried to make any jewelery earlier, though I bought a mountain load of them...so when I did try, I came up with this charming necklace:

Made totally from frugal items that you can lay your hands on at any craft store, this pretty necklace is going to be one of my favorite accessories to jazz up a plain shirt! The crystals sparkle and the pictures do not do any justice to the real way they glow, but I think you get the idea!

Making this was super duper easy, and all those jewelery making pros out there could do this in like 15- 20 minutes! You will need:
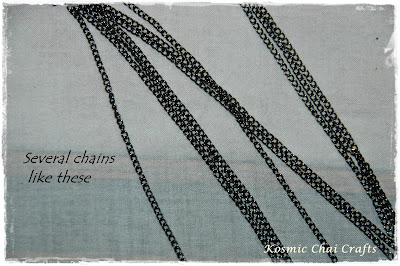
 Simple silver chain strands (mine were around 20 inches long)..I bought mine at the local store some time ago, just as a whim, as they were quite cheap!

A  crystal strand...if you don't get this straightaway, you can easily make it on your own by linking crystals of the color of your liking with hoop rings. I salvaged mine from another old jewelery piece!
A metal clasp or hook (optional if you don't want one!)
Jewelery pliers

Now for the fun! Decide how many chain strands you want to include in the necklace. I chose 5 silver strands and a crystal strand, making a total of 6 strands. Take the silver chain strands, cut the lengths of each one from longer to shorter and spread them neatly. I wanted my necklace to be on the longer side (the longest strand being around 32 inches long, that is, 16 inches when worn). Decide the length you want for the necklace, and keep in mind that it will be halved when you wear it. Next, I cut 12 silver strands, 7 inches each. Take your crystal strand in the desired length and link it with 6 of these short silver strands on both sides with the help of metal hoop rings. Confused? It is very easy , actually:

There, your crystal strand is now ready to be joined with the 5 long silver strands. Secure with metal hoop ring on both ends. Now link a metal clasp or hook on one of the ends. If you do not want a metal clasp, simply join both metal rings and press firmly with your plier.

 There you go, your necklace is now ready!
This beauty will glam-up any plain tank tops or shirts of yours! Go for it, ladies!
This was featured at
Blue Cricket Design
Photobucket
I linked this to these fab link parties..Join the fun!
http://itssoverycheri.com/2010/02/14/its-so-very-creative-party/
Whatever Goes Wednesday @Someday Crafts
Market Yourself Monday on Sumo's Sweet Stuff


Get your craft on Thurs.

DIY Day @ ASPTL

The Girl Creative
<


Photobucket


Make it Yours @ My Backyard Eden
YOU'RE Into It! Linky Party! @ Hope Studios
giveaways
make it wear it

Tuesday, February 9, 2010

Valentine's Heart Wired Flowers


Is that a funny name? Anyways, I came up with this lovely creation today:Wired heart flowers!!
I love this, to the point of insanity!! Wouldn't you like to make some for this V-day, too?
Here is what you will need:
Floral wire 
Glue
Fabric (to make flowers from of course!)
Floral tape
Buds (optional). Lets get started!!
Just for the sake of clarity, this is how my floral wire looked like

Snip a piece of floral wire according to the size of the flower desired by you. Take a reference shape to get the perfect circular shape(Mine was a deodorant bottle!!). Pull the wire tight so as to get a perfect circle, and twist around one end over the other, to lock in the shape.


Okay, the next step is to put in your index fingers inside the loop and turn them outwards, while you pinch in at the middle..Don't get that? You simply have to make a heart shape out of the circle, like this:

Now spread the fabric right side down. Hold the wired heart and apply glue onto the surface. Place the glued side onto the wrong side of fabric facing up, and press like this


Repeat the same steps for as many petals and flowers you want. I made the first flower with 5 big petals, and 3 smaller flowers, too! Let them dry..and attend to that laundry!


It was a pretty pink satin cloth I chose, and another one with white polka dots on white. 
Okay, back to it, cut the petals carefully along the wire edge as they dry. Here is how it will be like


Pretty already! Now stack them up together, right side up, like this


Twist all the wires together. Be sure you have twisted the wires tight. Now spread them, and arrange in a flowery shape. Wrap the wires with a floral tape, and you have this


You can do so many things with these pretty flowers...Arrange them on a mantel, or a vase..or tie them as a corsage, may be...

Right now I'm making more of these beauties! What do you think of them V-day wired hearts??
Linked to some cool parties..Join me here!


Get your craft on Thurs.
The Girl Creative
monogram